Originally posted on March 2, 2019 on our previous website platform.
Do you ever an idea in your head that keeps you up at night? For me, it was this scarf idea. I had donated a hat to my a fundraiser my cousin was hosting. It was the Peek-a-boo plaid hat from Ravelry. Check it out here if you are a crocheter or a plaid lover. Apparently the hat did well as a silent auction prize and people were asking if I sold them and if there was a scarf to match.
I have never designed a scarf before. I had only ever designed a crib sized baby blanket, (check it out here) and although that is larger, this seemed more daunting.
However, the idea that someone or perhaps more than one someone, had asked about a scarf made me think it would be a good seller at one of our craft shows.
So I'm wide awake, laying in my bed, while on a family vacation at the Great Wolf Lodge, trying to figure out how to make this scarf happen. The next evening when the two members of the fourth generation had finally wore themselves out from the waterpark, I searched the hotel room for a piece of paper and a pen.
What I found was an envelop, that I carefully opened up and wrote on the inside. I attempted to plan out the rows of the scarf without having much to work with for yarn and materials. You can see my envelop planning here in the first picture I took of the scarf in progress for Instagram.
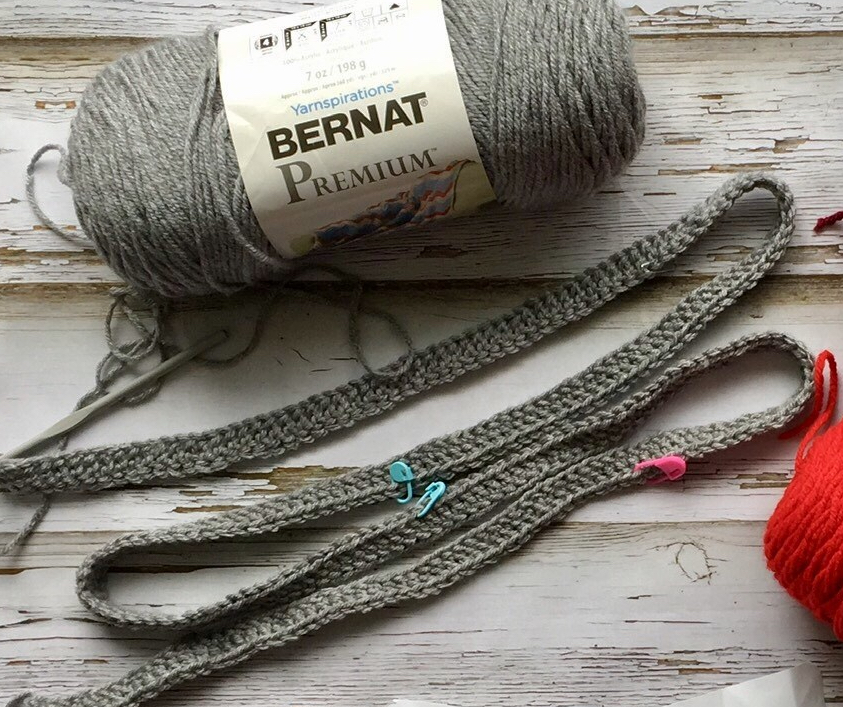
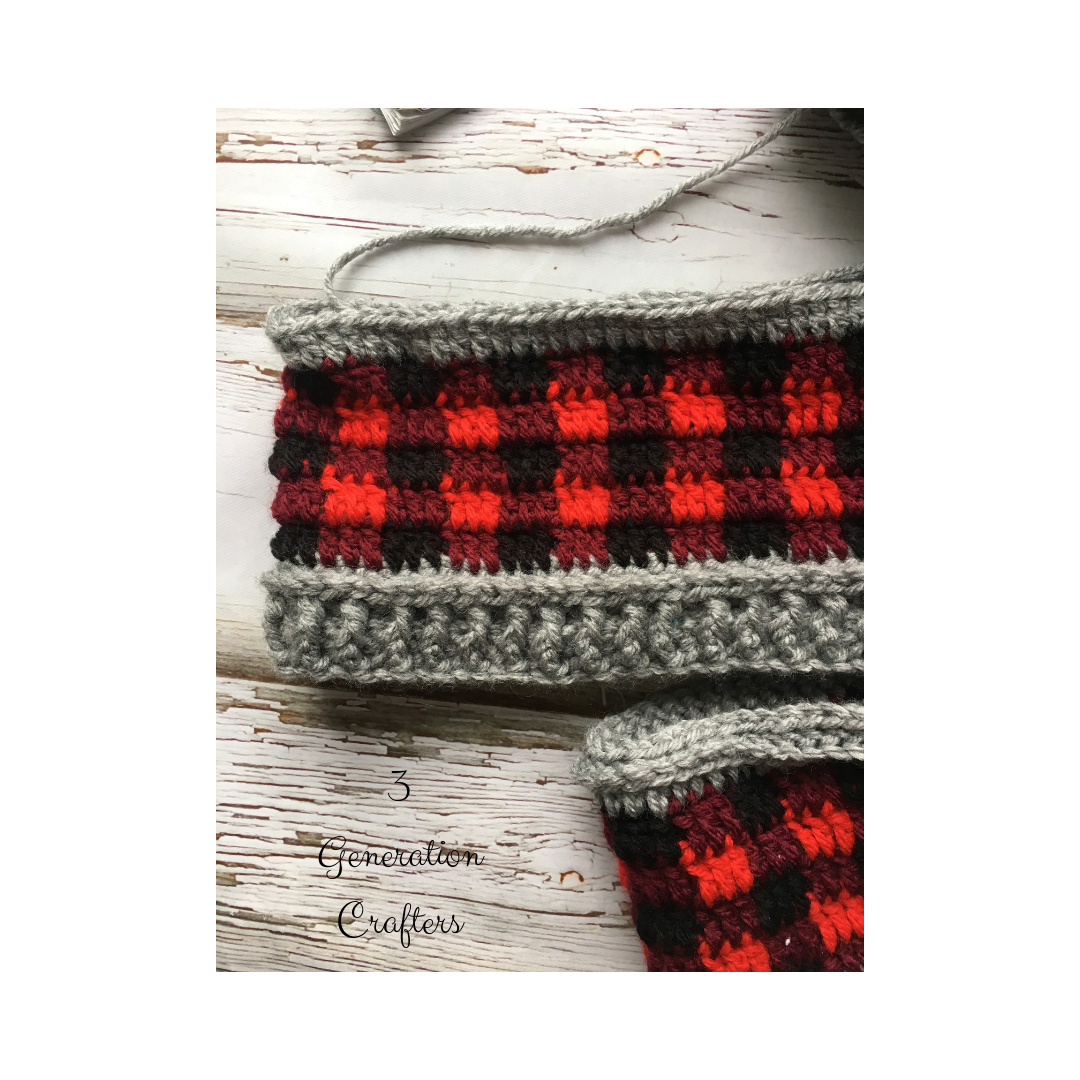
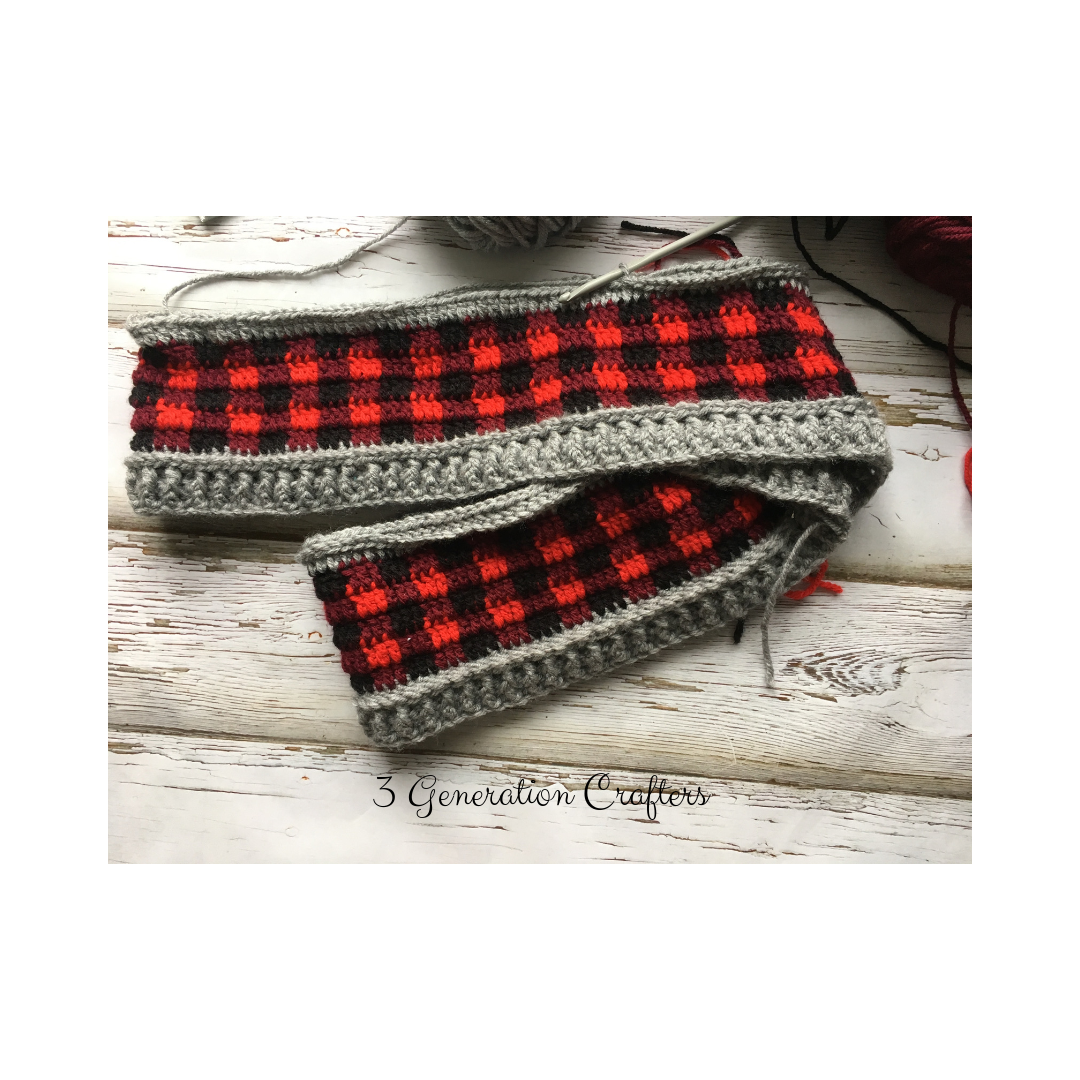
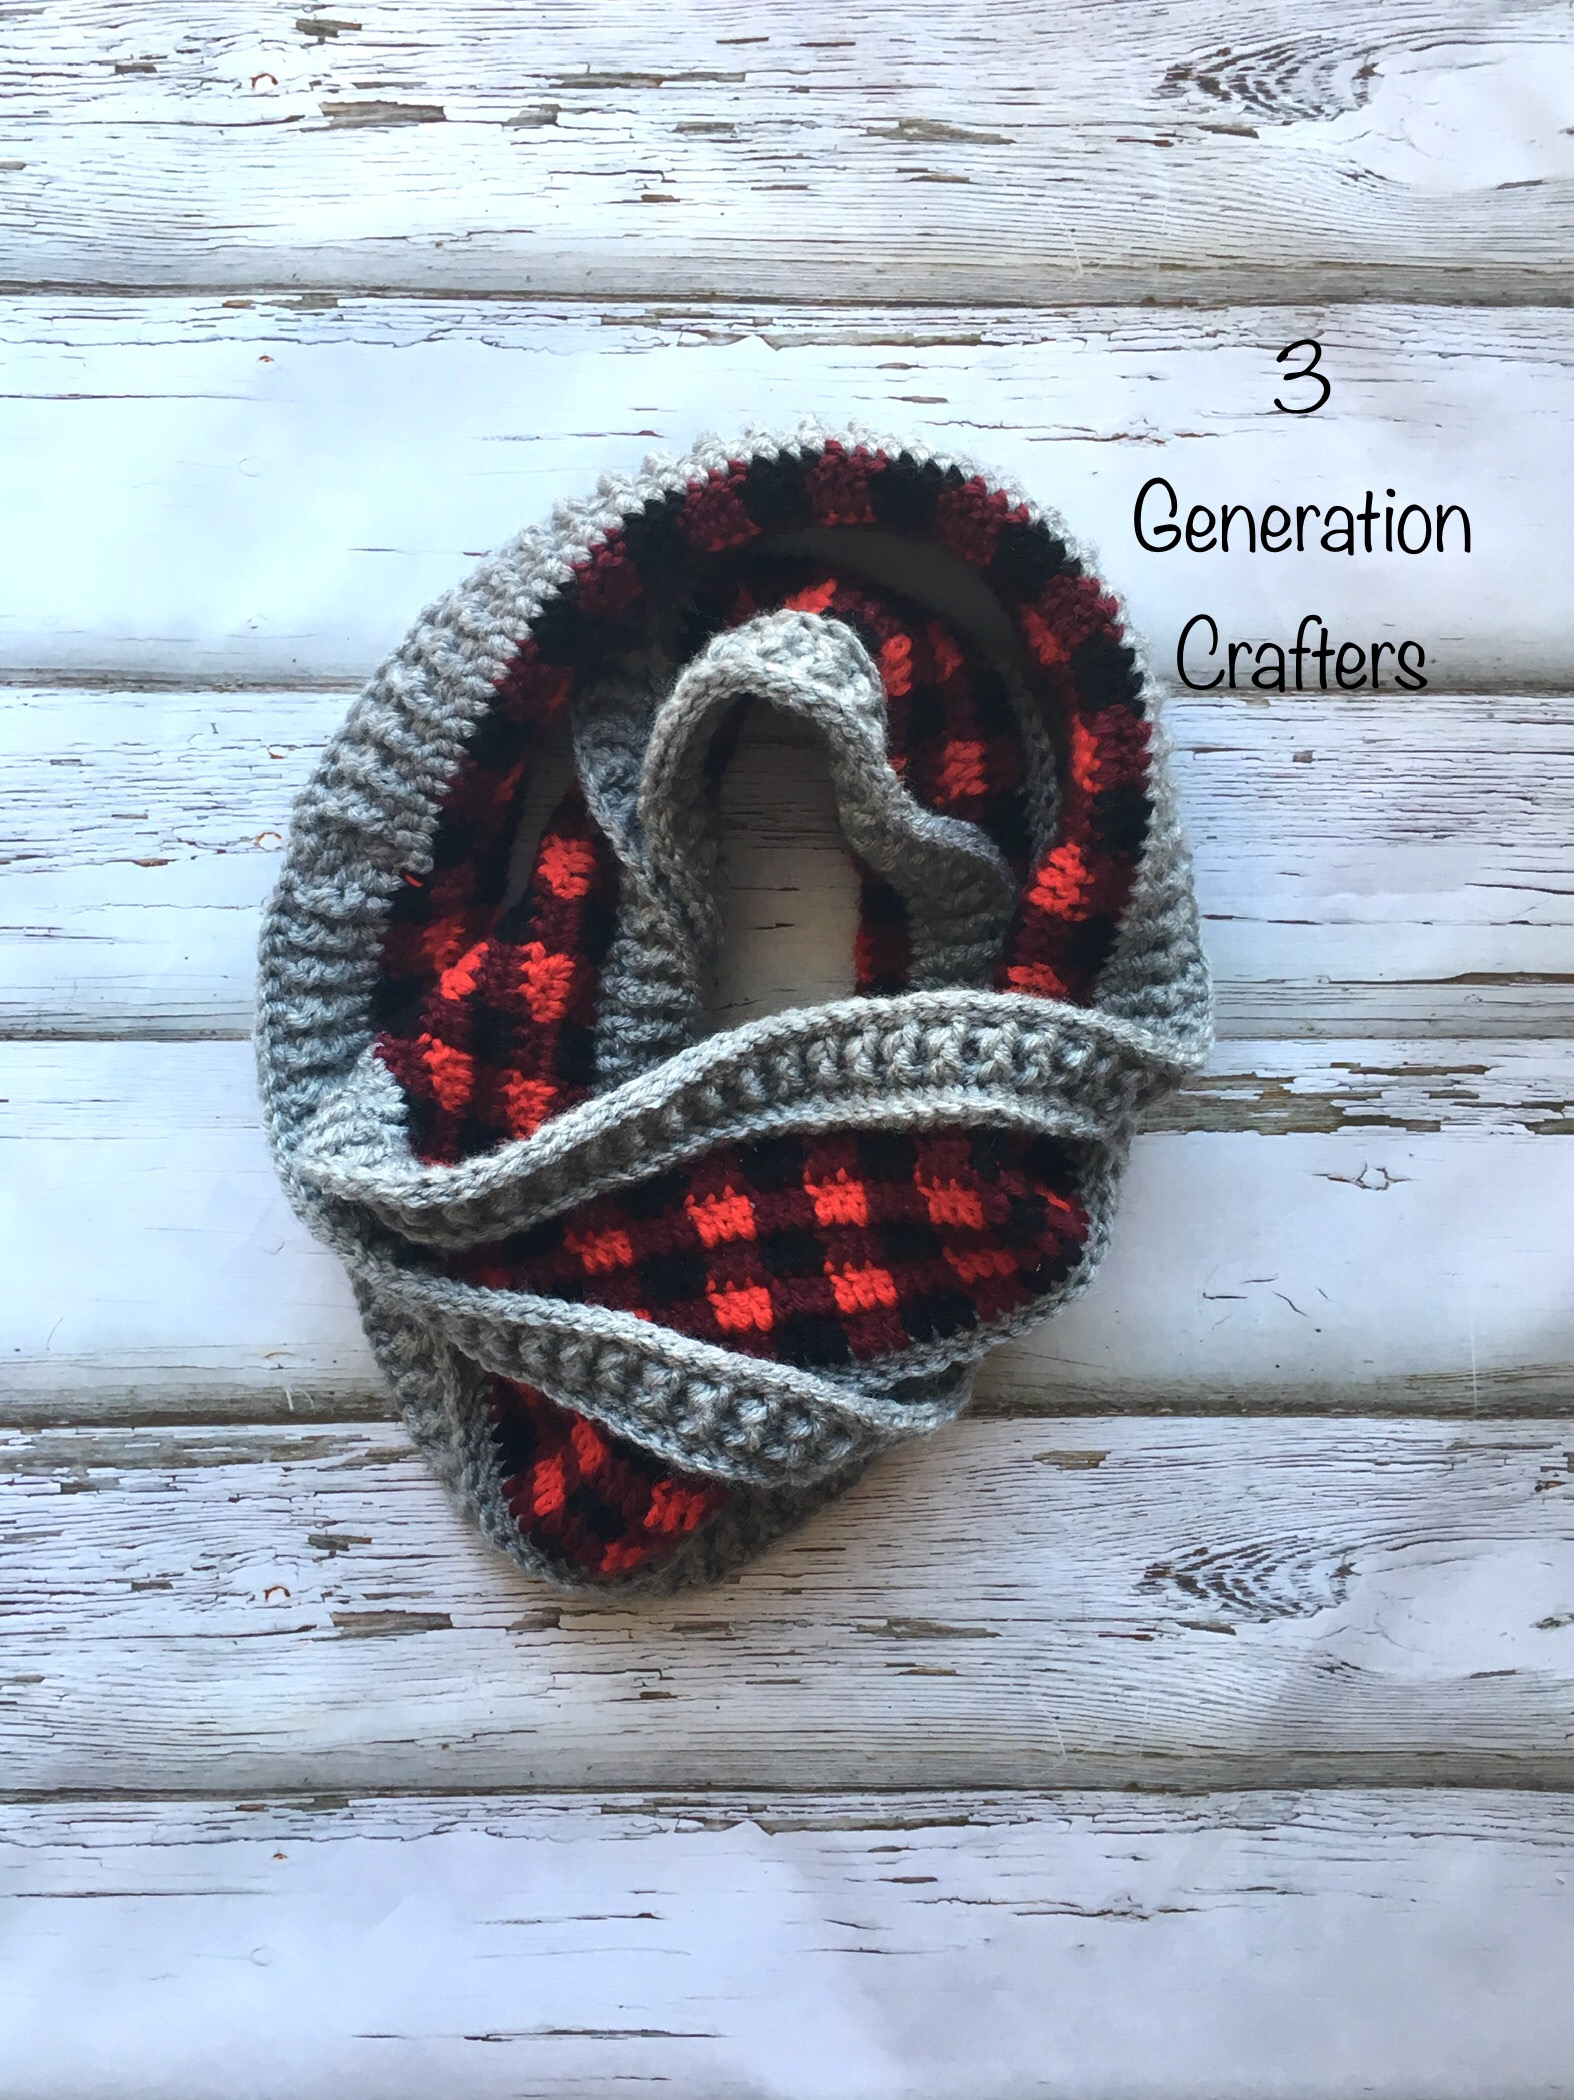
Although the initial math had me frustrated, I am very happy with now the scarf turned out. My sister had to put up with a lot of "do you think this looks okay?" questions during this process. Trying to get the perfect balance between grey and plaid was tricky. I had something slightly different envisioned before I started stitching, but I think it will work better in a cowl not an infinity scarf. Stayed tuned for another plaid design soon.
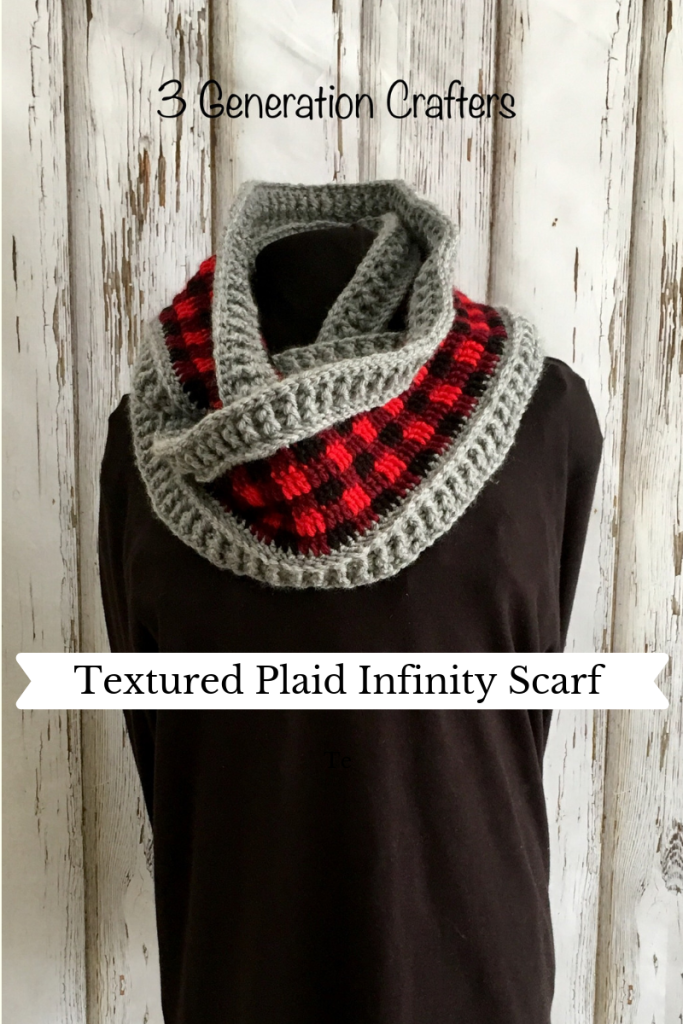
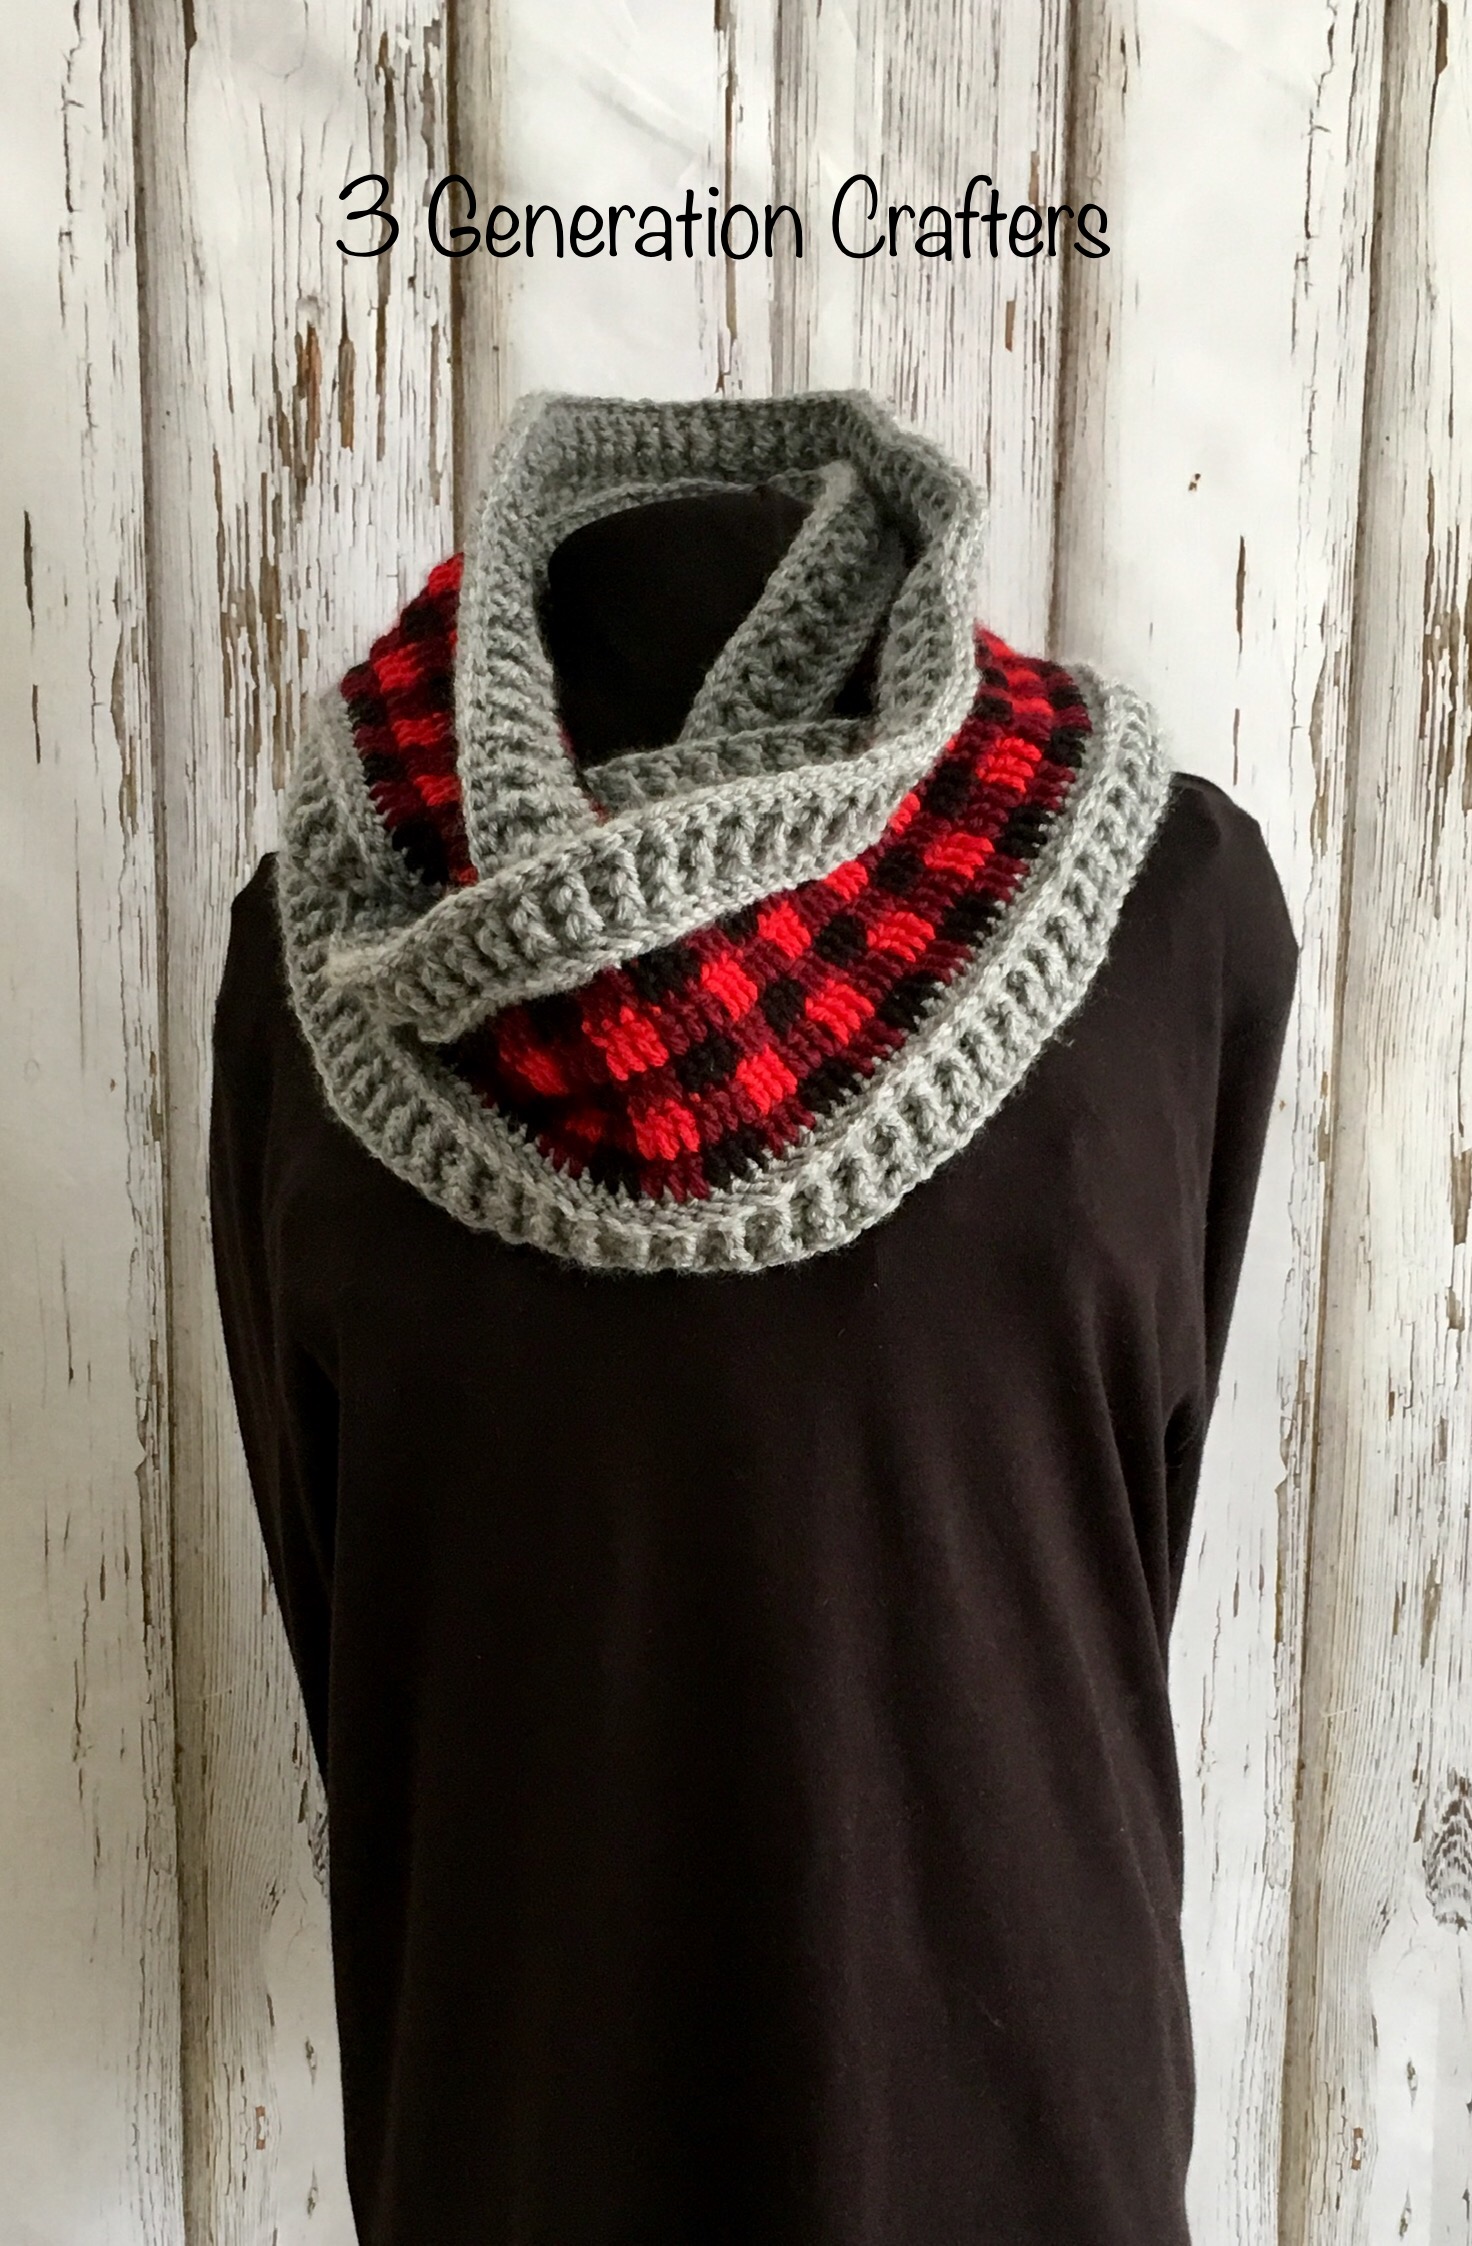
Textured Plaid Infinity Scarf
Supplies:
5.5 mm hook
Yarn
- Bernat Premium Soft Grey Heather
- Bernat Premium Black
- Bernat Premium Burgundy
- Bernat Premium Red
Stitch markers
Stitches Used:
fdc – foundation double crochet
fpdc – front post double crochet
bpdc – back post double crochet
dc - double crochet
sl st – slip stitch
ch – chain loop
fpsc – front post single crochet st – stitch
Size:
One size. To adjust, add or subtract stitches in multiples of 6.
Finished Measurements:
Length – 65 inches
Height – 6 inches
Notes:
This infinity scarf is worked in the round. Sl st the end of each row to the beginning stitch of that row. Ch 2 and begin next row. Ch2 does not count as a stitch.
If you prefer, you can chain 252 and then dc across, instead of fdc 252 stitches.
Gauge:
16 dc and 6 dc rows = 4”
Pattern:
Row 1 - Fdc 252 sts. On stitch 252 do a regular dc, not a fdc, as you do not want to create another stitch foundation because this is the last stitch of of the row.
Row 2 - Fpdc and bpdc alternating. Join to first fpdc with a sl st. Ch 2. (252 sts)
Row 3 - Fpdc and bpdc alternating. Your stitches should line up with the previous row.Put a st marker in the top of your first stitch. Ch 1 (Does not count as a stitch). (252 sts)
Row 4 - Fpsc – join with a sl st and finish off. (252 sts)
Row 5 - Begin plaid stitches using black and burgundy. You are crocheting in the stitches made in Row 3. Your first stitch will go into the stitch with the stitch marker. Working in groups of 3 dc sts alternate between black and burgundy. (252 sts)
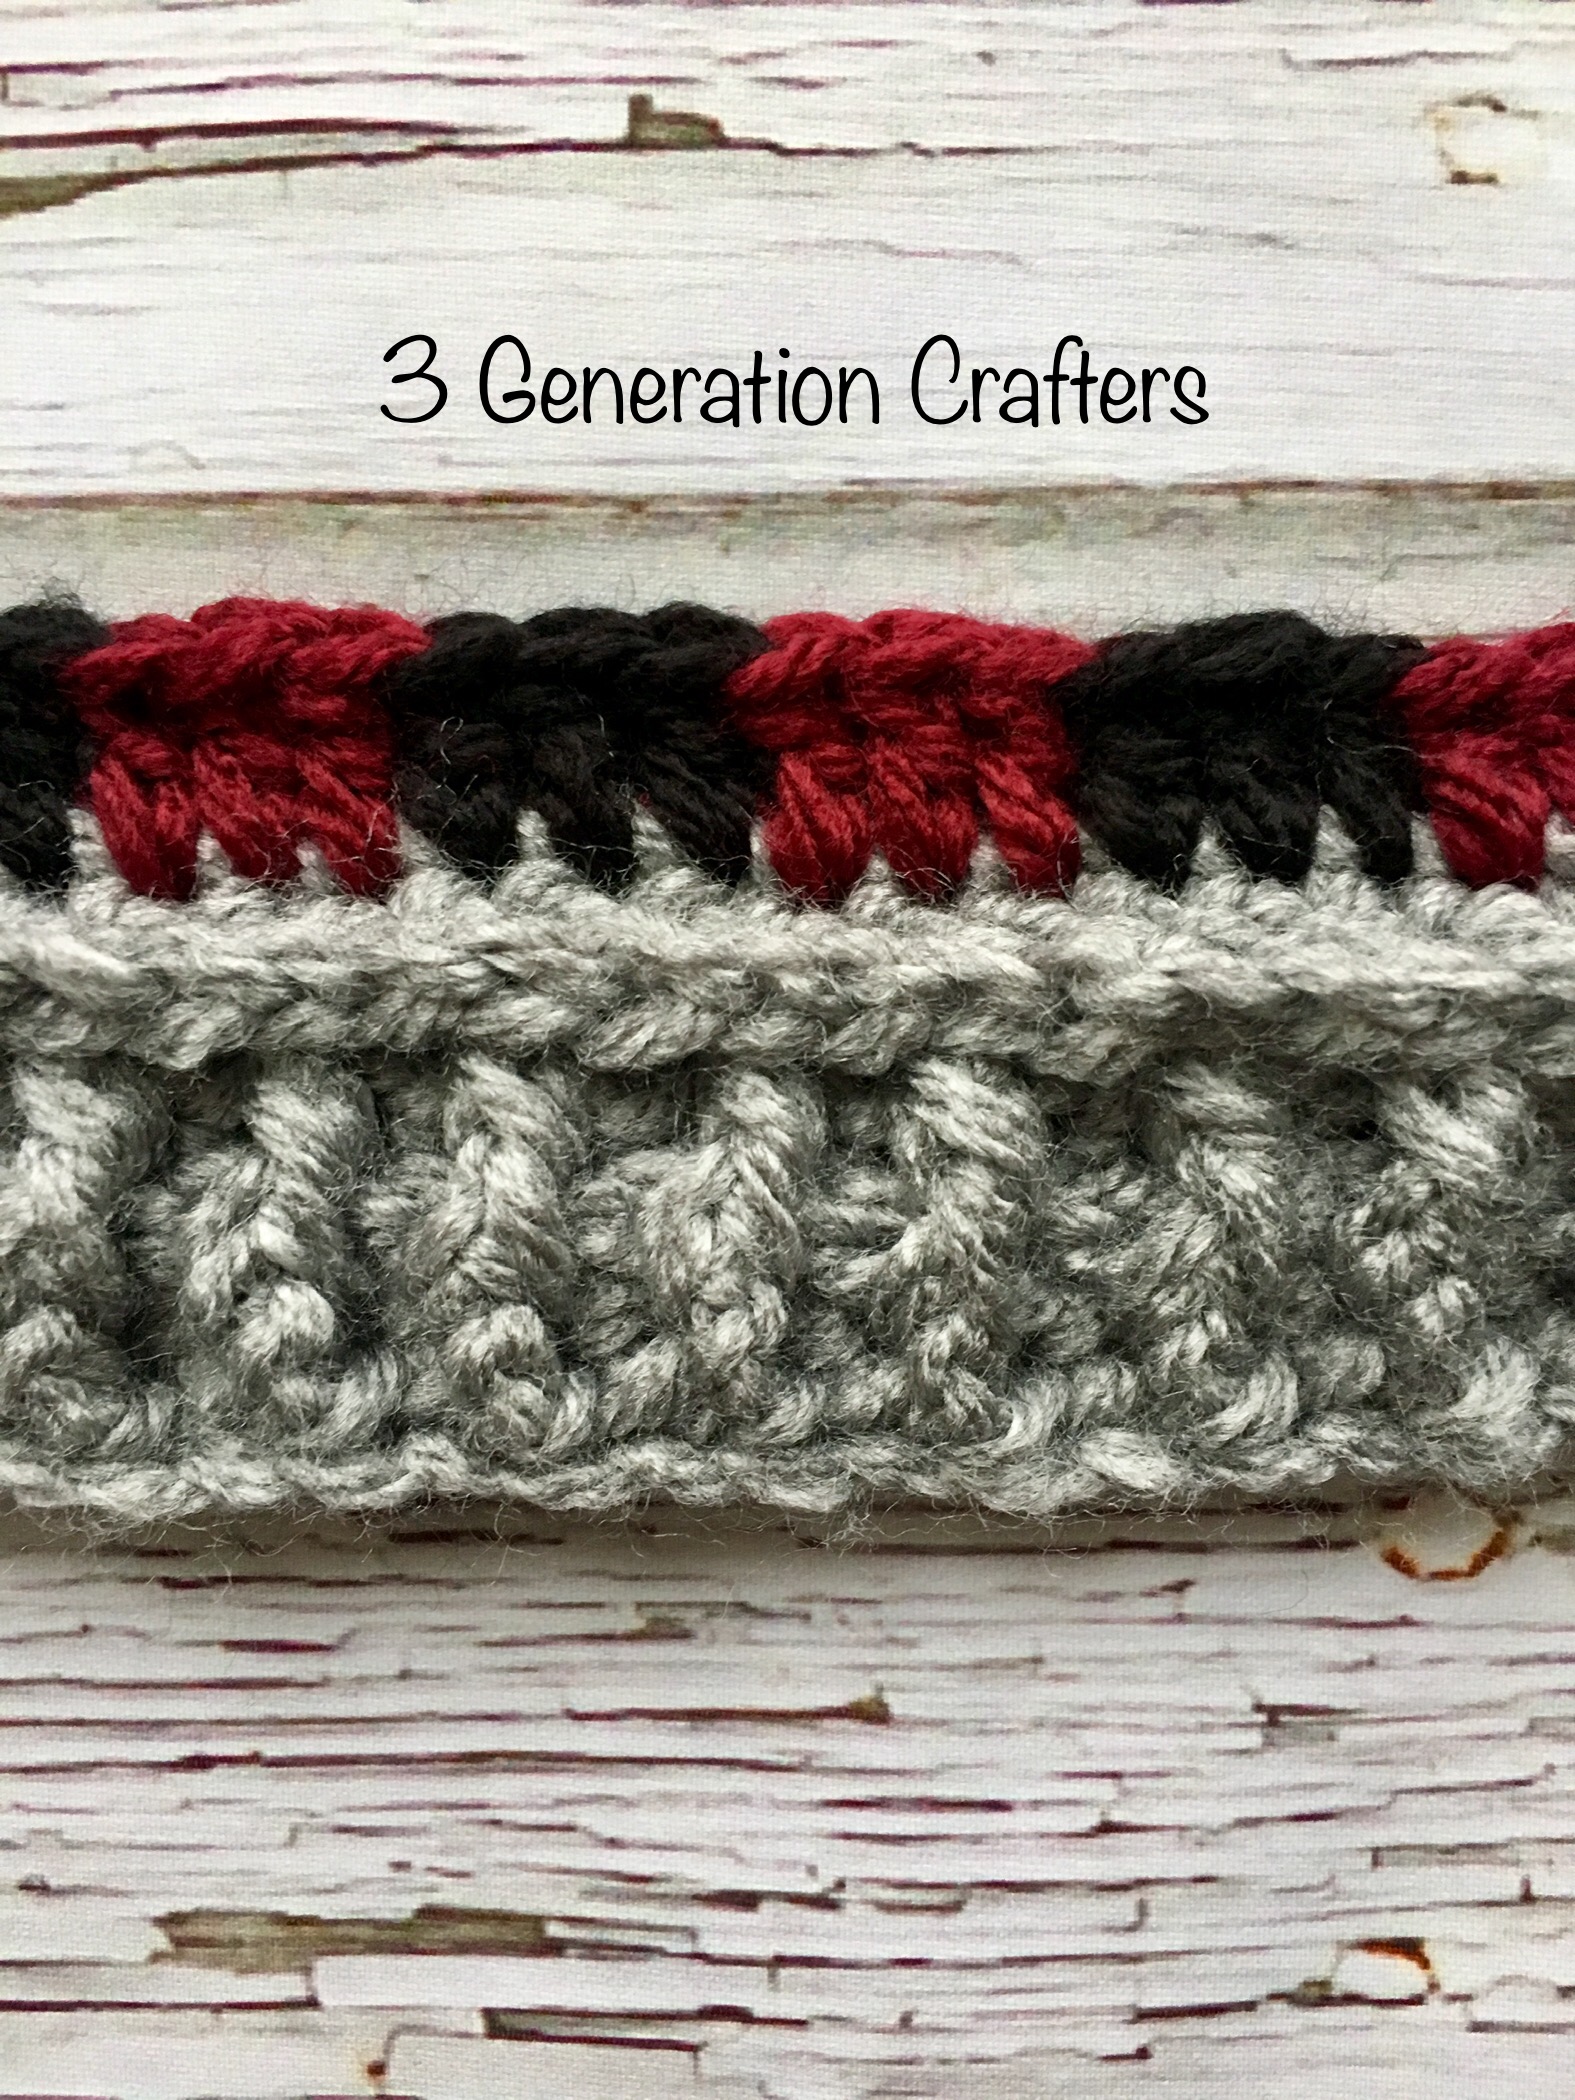
Row 6 - Plaid stitches. Alternating groups of 3 dc with burgundy and red. (252 sts)
Row 7 - Plaid stitches. Alternating groups of 3 dc with black and burgundy. (252 sts)
Row 8 - Plaid stitches. Alternating groups of 3 dc with burgundy and red. (252 sts)
Row 9 - Plaid stitches. Alternating groups of 3 dc with black and burgundy. Finish off. (252 sts)
Row 10 - Using grey, dc in each st around (252 sts). Joing with a sl st. Place stitch marker into the first stitch of this row. Ch 1 (Does not count as a stitch)
Row 11 - Fpsc (252 sts) Join to first fpsc with a sl st. Sl st back to first dc of previous row. This will be the stitch with the stitch marker. Ch 2
Row 12 - Fpdc and bpdc alternating. Join to first fpdc with a sl st. Ch 2 (252 sts)
Row 13 - Fpdc and bpdc alternating. Your stitches should line up with the previous row. (252 sts)
Row 14 - Sl st around to create finishing edge.
Thank you for checking out our blog and pattern.
Amanda - Third generation at 3 Generation Crafters